Nix, Direnv, Just, the trio that makes life easier
Nothing is more frustrating when working on a project than having to:
- Search for the necessary tools to work on this project (compilation, development, etc.).
- Manage the versions of installed packages based on their installation date.
- Manage the distributions on which these packages are installed (used package manager).
During the development phase of a project, maintaining a consistent development environment that evolves over time is quite challenging, due in part to the following:
- Some packages are not available on all distributions of Windows, MacOS, Linux (Ubuntu, Archlinux, Fedora, Suse, etc.).
- Package versions may become unavailable due to distribution changes.
Some modern programming languages have recognized this challenge and have dependency management systems with locking features to ensure the reproducibility of development environments, including:
- Go
- Python
- Ruby
- Rust
- etc …
These systems allow for maintaining the same dependencies throughout the project’s lifecycle, but this only applies to the libraries used and not to all third-party tools.
That’s why I use the trio:
- Nix: Enables obtaining a reproducible system.
- Direnv: Allows executing a command upon entering a directory.
- Just: Provides a command runner and help display.
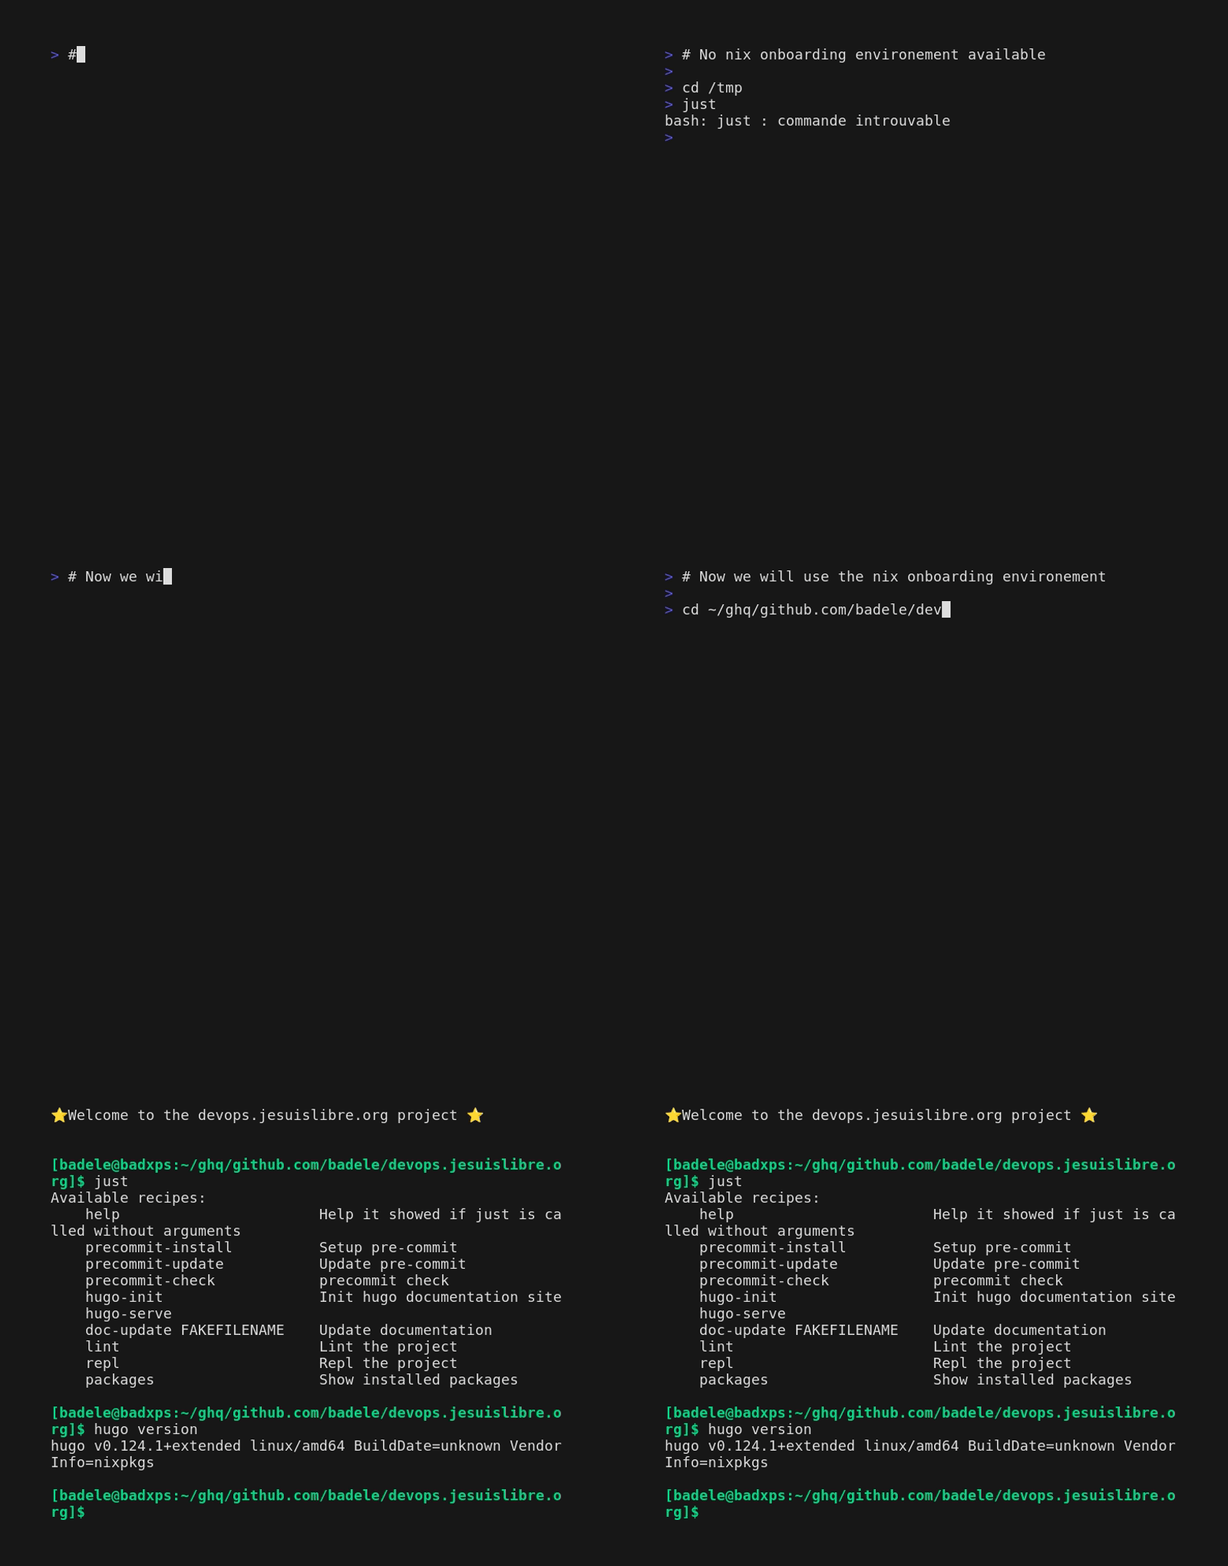
Here is an example of use for the documentation project of JSL Devops
At first, you will notice that the just and hugo tools are not available in
the user’s distribution. However, without intervention on his part, you will
find that they become available thanks to Nix and the flake.nix file.
Install the direnv package
# install direnv
curl -sfL https://direnv.net/install.sh | bash
Configure the shell to take direnv into account during a new shell.
Add the following line to the end of the ~/.bashrc file:
eval "$(direnv hook bash)"
Add the following line to the end of the ~/.zshrc file:
eval "$(direnv hook zsh)"
Add the following line to the end of the ~/.config/fish/config.fish file:
direnv hook fish | source
Fish supports 3 modes which you can set with environment variable global
direnv_fish_mode:
set -g direnv_fish_mode eval_on_arrow    # Trigger direnv at the prompt, and on each directory change with arrow (default)
set -g direnv_fish_mode eval_after_arrow # Trigger direnv at prompt, and only after arrow changes directory before executing command
set -g direnv_fish_mode disable_arrow    # Trigger direnv at prompt only, this is similar functionality to the original behavior
sh <(curl -L https://nixos.org/nix/install) --daemon
grep 'experimental-features' /etc/nix/nix.conf || (echo 'experimental-features = nix-command flakes' | sudo tee -a /etc/nix/nix.conf)
sh <(curl -L https://nixos.org/nix/install) --daemon
grep 'experimental-features' /etc/nix/nix.conf || (echo 'experimental-features = nix-command flakes' | sudo tee -a /etc/nix/nix.conf)
sh <(curl -L https://nixos.org/nix/install)
grep 'experimental-features' /etc/nix/nix.conf || (echo 'experimental-features = nix-command flakes' | sudo tee -a /etc/nix/nix.conf)
Once nix and direnv are installed, when you first access the directory of a project, you will have to authorize the automatic execution of direnv with the following command:direnv allow
You can also launch onboarding with the following commandnix develop
The just tool will be installed automatically with nix and flake, see the
next section.
To activate the onboarding of the project, simply copy the 3 files below in the root directory of your project.
projet
├─ .envrc
├─ flake.nix
└─ justfile
Configuring the .envrc file
use flake
Configuring the flake.nix file
{
  inputs = {
    nixpkgs.url = "github:NixOS/nixpkgs/nixos-unstable";
    flake-utils.url = "github:numtide/flake-utils";
  };
  outputs = { nixpkgs, flake-utils, ... }:
    flake-utils.lib.eachDefaultSystem (system:
      let
        pkgs = import nixpkgs { inherit system; };
      in
      {
        devShells.default = with pkgs;
          mkShell {
            name = "Default developpement shell";
            packages = [
              cocogitto
              nixpkgs-fmt
              nodePackages.markdownlint-cli
              pre-commit

              deno
              gum
              just
            ];
            shellHook = ''
              export PROJ="devops.jesuislibre.org"

              echo ""
              echo "⭐ Welcome to the $PROJ project ⭐"
              echo ""
            '';
          };
      });
}
Configuring the justfile file
#!/usr/bin/env just -f

# This help
# Help it showed if just is called without arguments
@help:
    just -lu | column -s '#' -t | sed 's/[ \t]*$//'

###############################################################################
# pre-commit
###############################################################################

# Setup pre-commit
precommit-install:
    #!/usr/bin/env bash
    test ! -f .git/hooks/pre-commit && pre-commit install || true

# Update pre-commit
@precommit-update:
    pre-commit autoupdate

# precommit check
@precommit-check:
    pre-commit run --all-files

###############################################################################
# Tools
###############################################################################

# Update documentation
@doc-update FAKEFILENAME:
    ./updatedoc.ts

# Lint the project
@lint:
    pre-commit run --all-files

# Repl the project
@repl:
    nix repl --extra-experimental-features repl-flake .#

# Show installed packages
@packages:
    echo $PATH | tr ":" "\n" | grep -E "/nix/store" | sed -e "s/\/nix\/store\/[a-z0-9]\+\-//g" | sed -e "s/\/.*//g"

